Pinterest Tag is obligatory in order to track conversions and measure the performance for your Pinterest Ads, run specific type of campaigns, and create audiences in your account.
The Pinterest Tag has two components:
- The base code that you place on every page on your website, it is required for conversion tracking.
- The event code that you place on pages where you want to track conversions
There are several options to implement Pinterest Tag, like automated integrations, manual code placement, plugin installation etc. In this post, I’ll be explaining how to setup Pinterest Tag with using Google Tag Manager to your website. Pinterest Ads interface may change in time, still it’s quite straightforward to follow the steps.
Therefore, if you have website with major ecommerce platform like Shopify, it’s recommended to use their native integration as a smooth setup process.
At first, I assume you already have Pinterest Ads Business account, if not feel free to just sign up and create your account to proceed on.
Here is the first option to integrate the tag via Pinterest account Partner Integration with giving publish access to their interface. However, this method might not be suitable if you have unpublished changes on your container. By the way it might also stuck at 6th step that interrupts the process without publishing the tag automatically. I suggest you to at least try it as more convenient option, if you will encounter the issue, better to install the tag with following the second option.

Add Pinterest Tag to GTM – integration partner option
- Log in to your business account to view Account Overview and click Conversions under Ads or Business menu
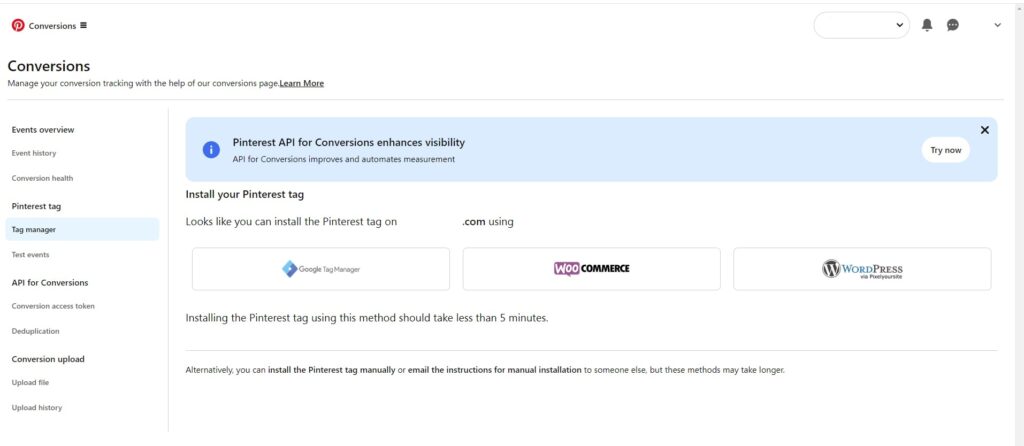
- Click Get started and/or Install the Tag under Pinterest Tag section
- Select Google Tag Manager in the Partner integration window, then click Continue
- In the new tab that opens, you should log in to your Google account that have access to GTM container and click Allow for all permissions
- You need to select the correct Account and Container, and click Continue
- Optionally, add a related variable to “Hashed Email” field
- Name for your tag and Click Install Tag

Add Pinterest Tag to GTM – Pinterest tag option
- Log in to your business account to view Account Overview and click Conversions under Ads or Business menu in order to get your Pinterest Tag ID: (i.e. 123456789)
- You can view that ID at Pinterest Tag section by clicking GTM button as that will be display at top right on pop-up page or at the page after clicking “install the Pinterest tag manually“
- After that, go to your Google Tag Manager and click to add a new Tag.
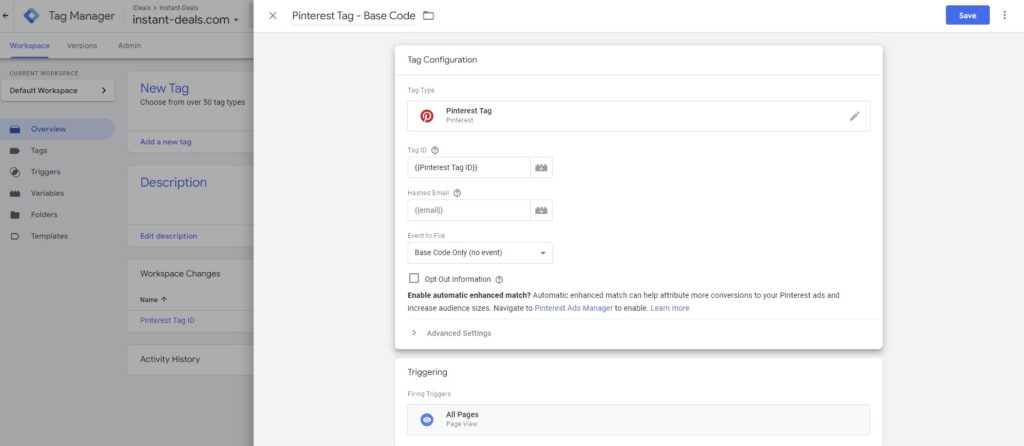
- Click to “Tag Configuration” section to search for “Pinterest Tag”
- Paste your Tag ID to the first field. Here you can prefer save your ID as variable to reuse for the next tag setups
- In order to do that, click to “+” icon and then “Variable Configuration” Choose “Constant” under Utilities list and paste your ID to the “Value” field. Name and save it.
- You may fill out “Hashed Email” fields with a related variable to comply with Enhanced Match. Otherwise, you may skip it as it’s an optional field.
- If you would like to only add the tag and/or make an initial setup, you can select “Base Code Only” at this step. However, I suggest you to select “Page Visit” as that event will behave as base code and fire both “INITIALIZED” and “PAGE_VISIT” And so you’ll be able to create audiences based on website visits.
- At next step, you should choose “All Pages” at Triggering section.
- By the way, if you run business in EU countries, you need to select All Pages with “Consent” filter
- Finally, Name the tag, Save and Publish.
Test Pinterest Tag Setup
After you add your Pinterest Tag, you can test it with “Preview” option on the Google Tag Manager account. It’s recommended to wait up to 10 minutes to make these tests.
Simply click to “Preview” page and paste the URL name and click “Connect” You should see your newly added tag at “Summary” section.
You can publish the changes on GTM account to make a new test with Pinterest Tag Helper Chrome extension. Install it to your browser and open the website.
The logo color of the extension should turn to red from grey if the tag is found on the website, you can click the icon to view the details.

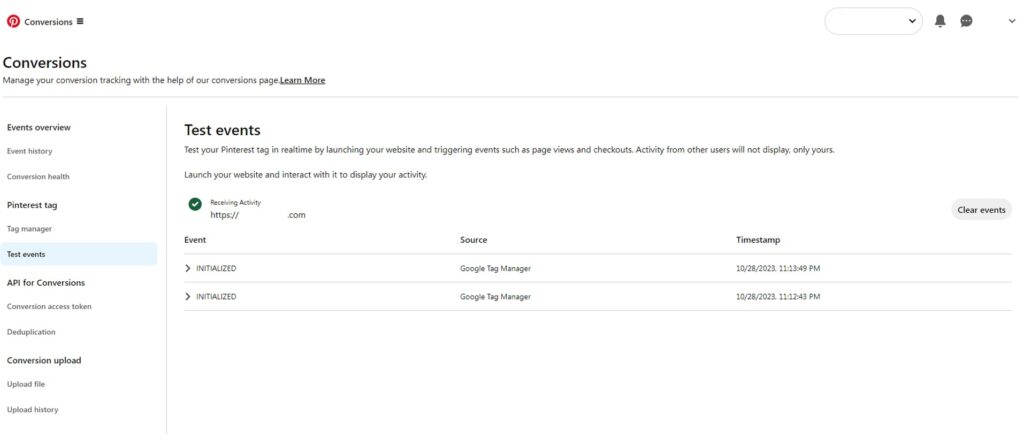
As an additional test, you should open your Pinterest account “Conversion” page and select “Test Events” option. After entering your domain, you should navigate on your website to confirm “EVENTS” on the Test Event screen.
After you’ve installed the Pinterest tag, it can take up to 24 hours to be reflected in Ads Manager.
Install Pinterest Tag with Conversion Events
At all steps above, we have successfully integrated Pinterest Tag “Base Code Only” -or “Page Visit” if you select that one- to our website with with Google Tag Manager. That initial setup do not automatically let the tag to fire any other Pinterest events especially the crucial ones for ecommerce websites.
You are able to send “Add to Cart, Checkout, Signup, Watch Video, Lead, Search, View Category or any other Custom events from GTM to your Pinterest Ad account.
In order to track all these events, first you need to create related triggers and variables for the events that you would like to use. If you integrated other platforms -like Google Ads or Analytics– to your GTM container, these triggers and variables should be already ready to use.
So, I assume you have them, and here the steps to follow to setup Pinterest events;

- If you only installed “Base Code Only” open that trigger, select “Page Visit” and rename the tag. There is no need to use both of them at the same time.
- It’s not required to copy & paste any codes. You can add a new Pinterest tag or just simply duplicate the current Pinterest Tag and only update the configuration, so you’ll have multiple Pinterest Tag but separated for each events.
- For example; if you want to add a Lead event to track outbound links on your website. You should duplicate the Pinterest Tag, name it, change Event to Fire to Lead. You can add any parameters to Lead Type which is actually Event Label. I added {{Page Path}} > {{Click URL}} that tracks visitors’ page and the URL that they clicked. And you shouldn’t select All Pages but have a Outbound Link Trigger to select for this event.
- Another example for Checkout conversion event to setup a purchase on your website. You should duplicate the Pinterest Tag, name it, change Event to Fire to Checkout. There should be dynamic variables on your GTM account to add them to “Order Value, Currency, Order Quantity and Order ID” fields at this setup. You can additionally add variable to Line Items in order to run Dynamic Retargeting on Pinterest. As obvious, you should select a Firing Trigger that only triggers at a successful checkout on your site.
- And so, just duplicate the tag to add a new event and update the required fields before publishing it.
- Finally, you should test all new events with following the steps mentioned previously.
If you need any help to implement Pinterest Tag to your website, feel free to contact me! 🙂
